Step 1: Create your account
Follow the steps in order. Each step includes a full-size screenshot and clear instructions underneath.
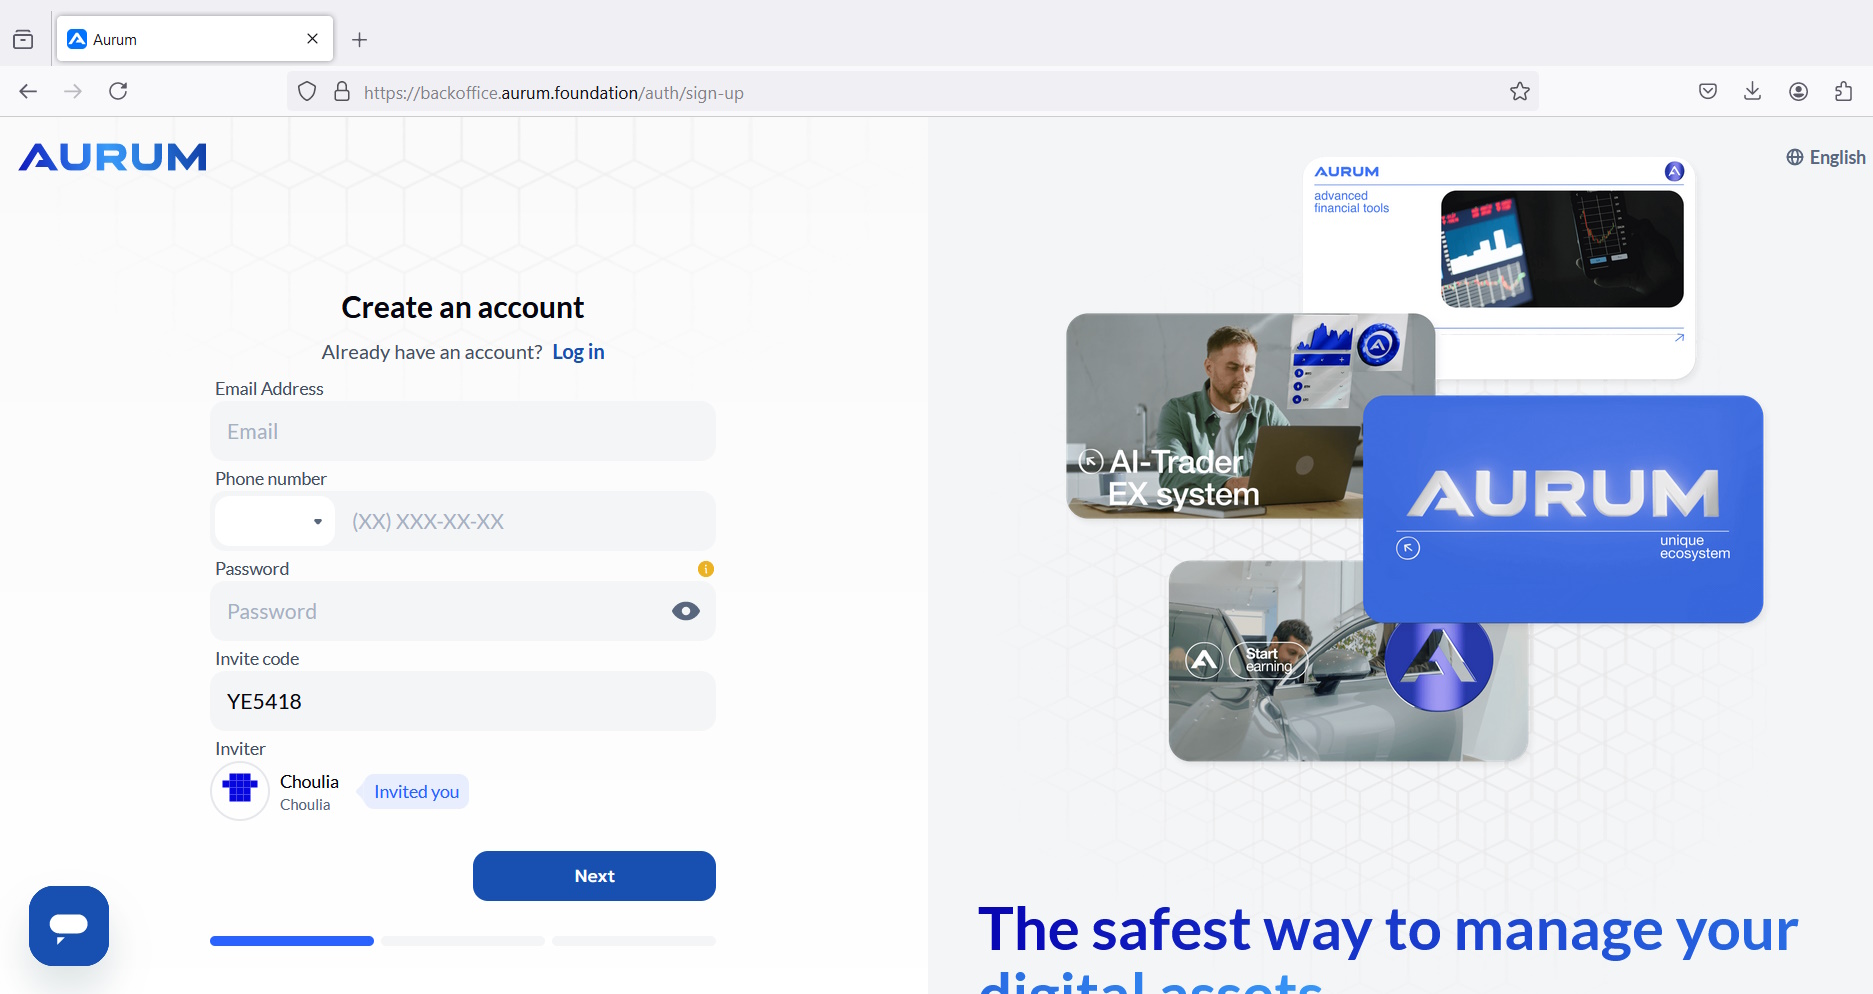
- Open the sign-up page.
- Enter your email and phone number.
- Create a strong password (unique, not reused anywhere).
- Make sure the Invite Code is filled (if you were given one).
- Click “Next” and complete any remaining registration prompts.
Step 2: Log in to the Back Office (Dashboard)
Follow the steps in order. Each step includes a full-size screenshot and clear instructions underneath.
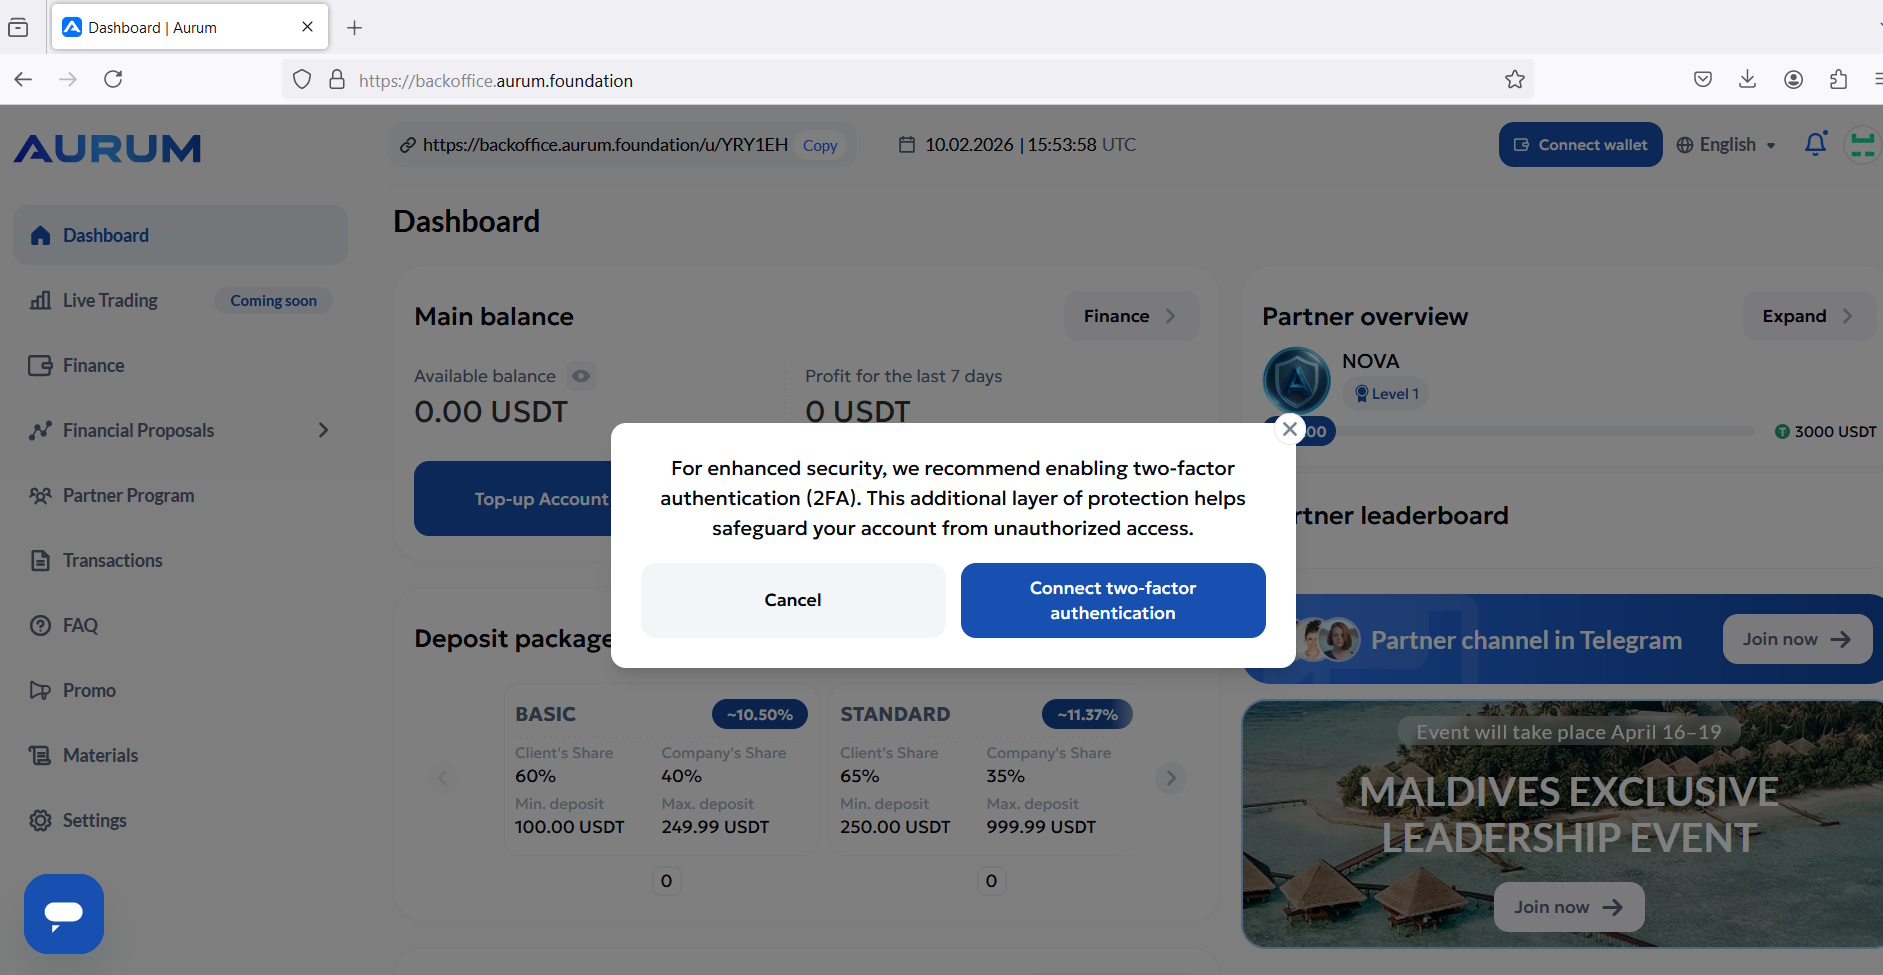
- Log in with the email and password you used during registration.
- You should land on the Dashboard where you can see your balance and the menu on the left.
Step 3: Turn on Two‑Factor Authentication (2FA)
Follow the steps in order. Each step includes a full-size screenshot and clear instructions underneath.
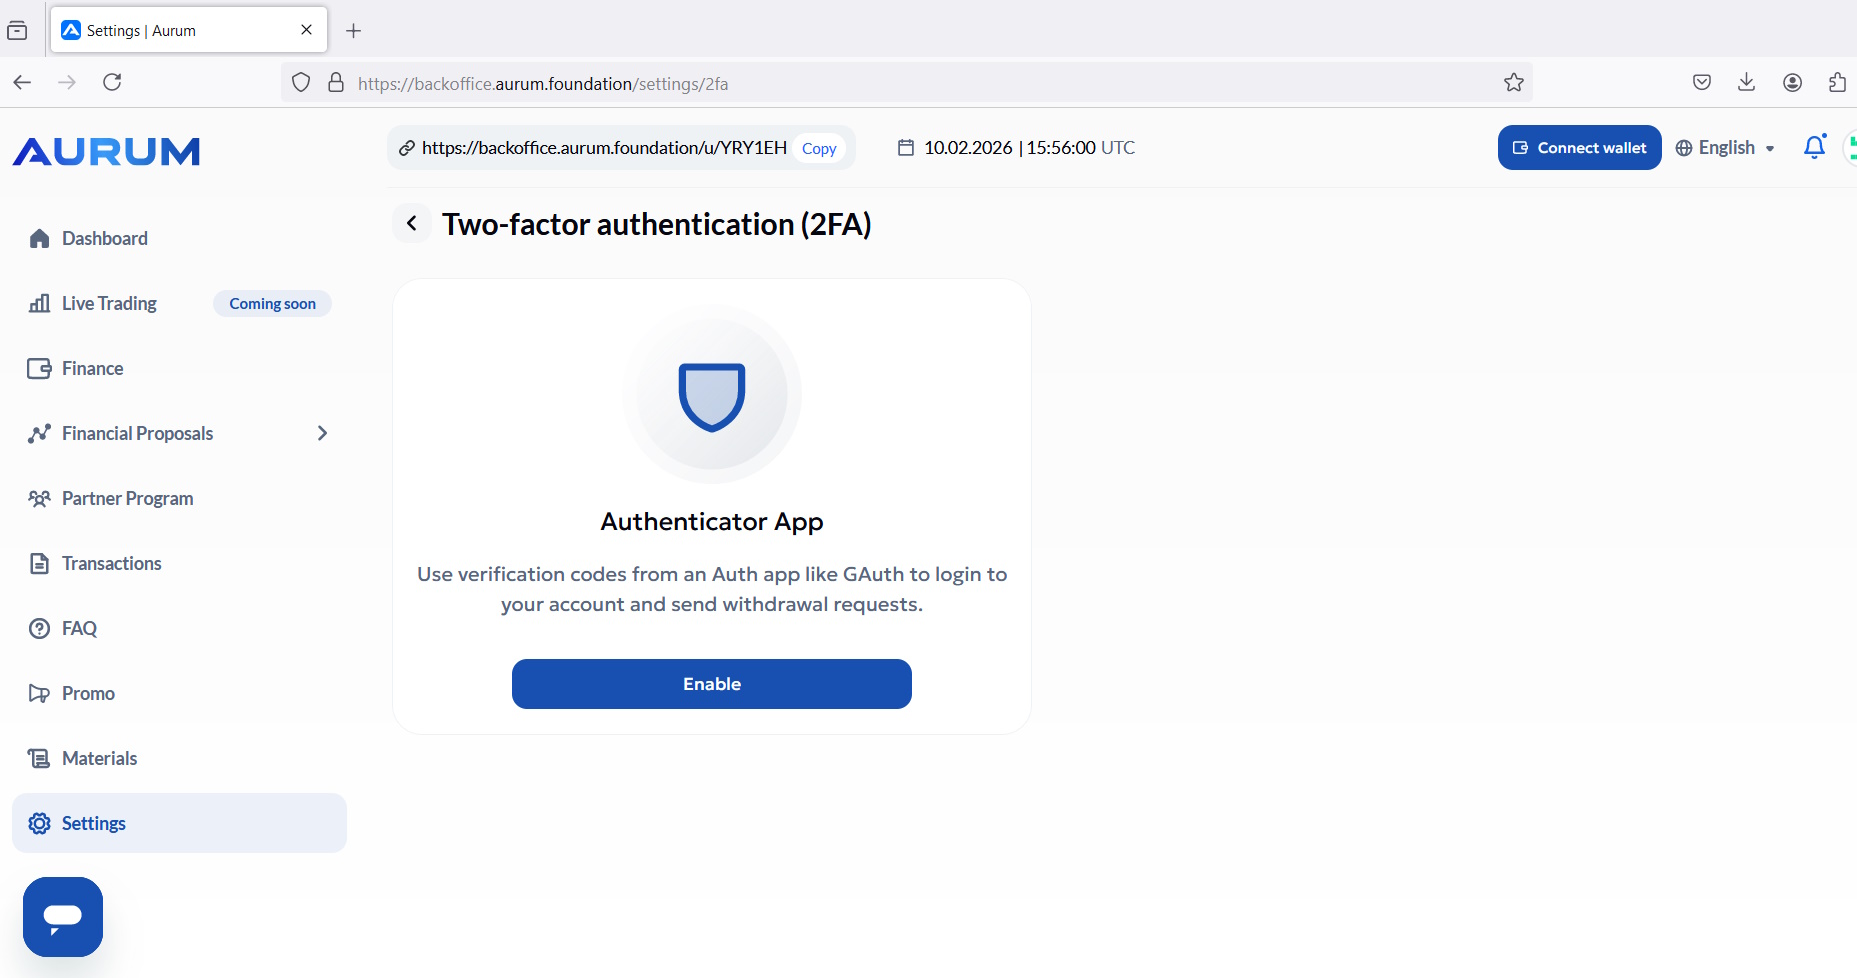
- Go to: Settings → Security → Two‑factor authentication (2FA).
- Click “Enable” to start setting up an Authenticator App.
- Install an authenticator app on your phone (Google Authenticator, Microsoft Authenticator, Authy, etc.) if you don’t already have one.
Step 4: Confirm 2FA with the 6‑digit code
Follow the steps in order. Each step includes a full-size screenshot and clear instructions underneath.
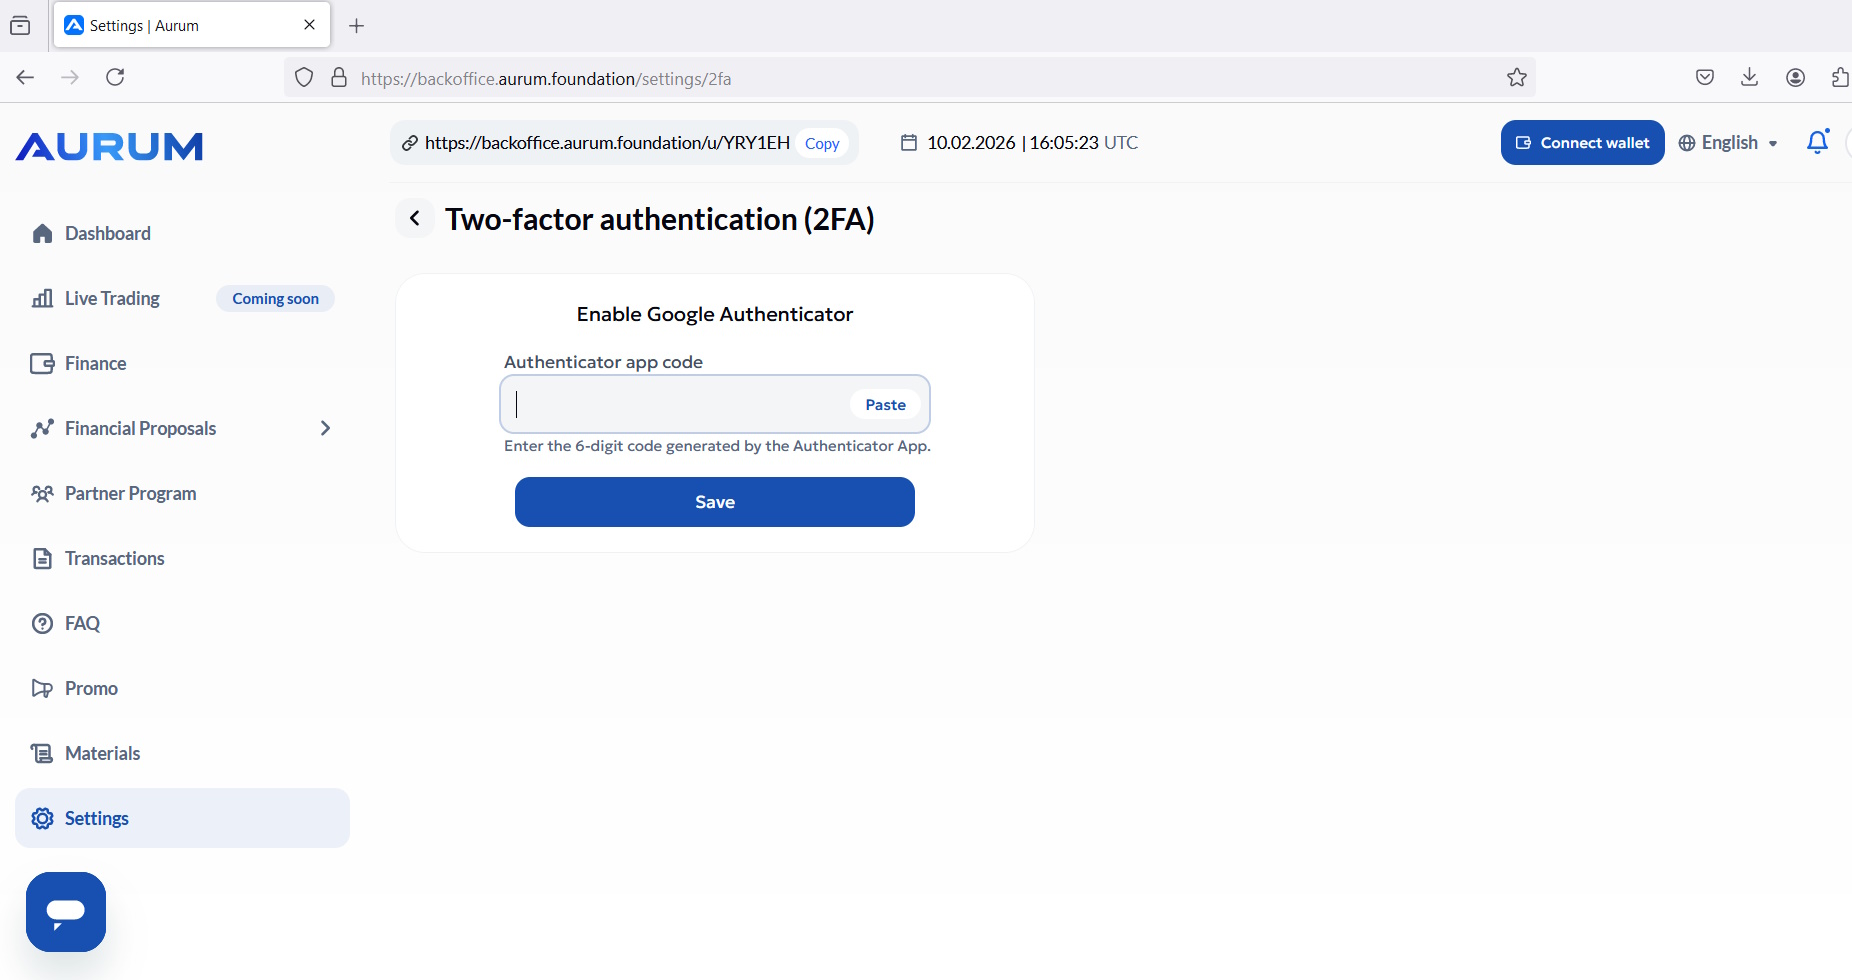
- Open your authenticator app and add the Aurum account (scan QR or add key, depending on what the platform shows).
- Enter the 6‑digit code from the app into the “Authenticator app code” field.
- Click “Save”.
Step 5: Verify 2FA is active
Follow the steps in order. Each step includes a full-size screenshot and clear instructions underneath.
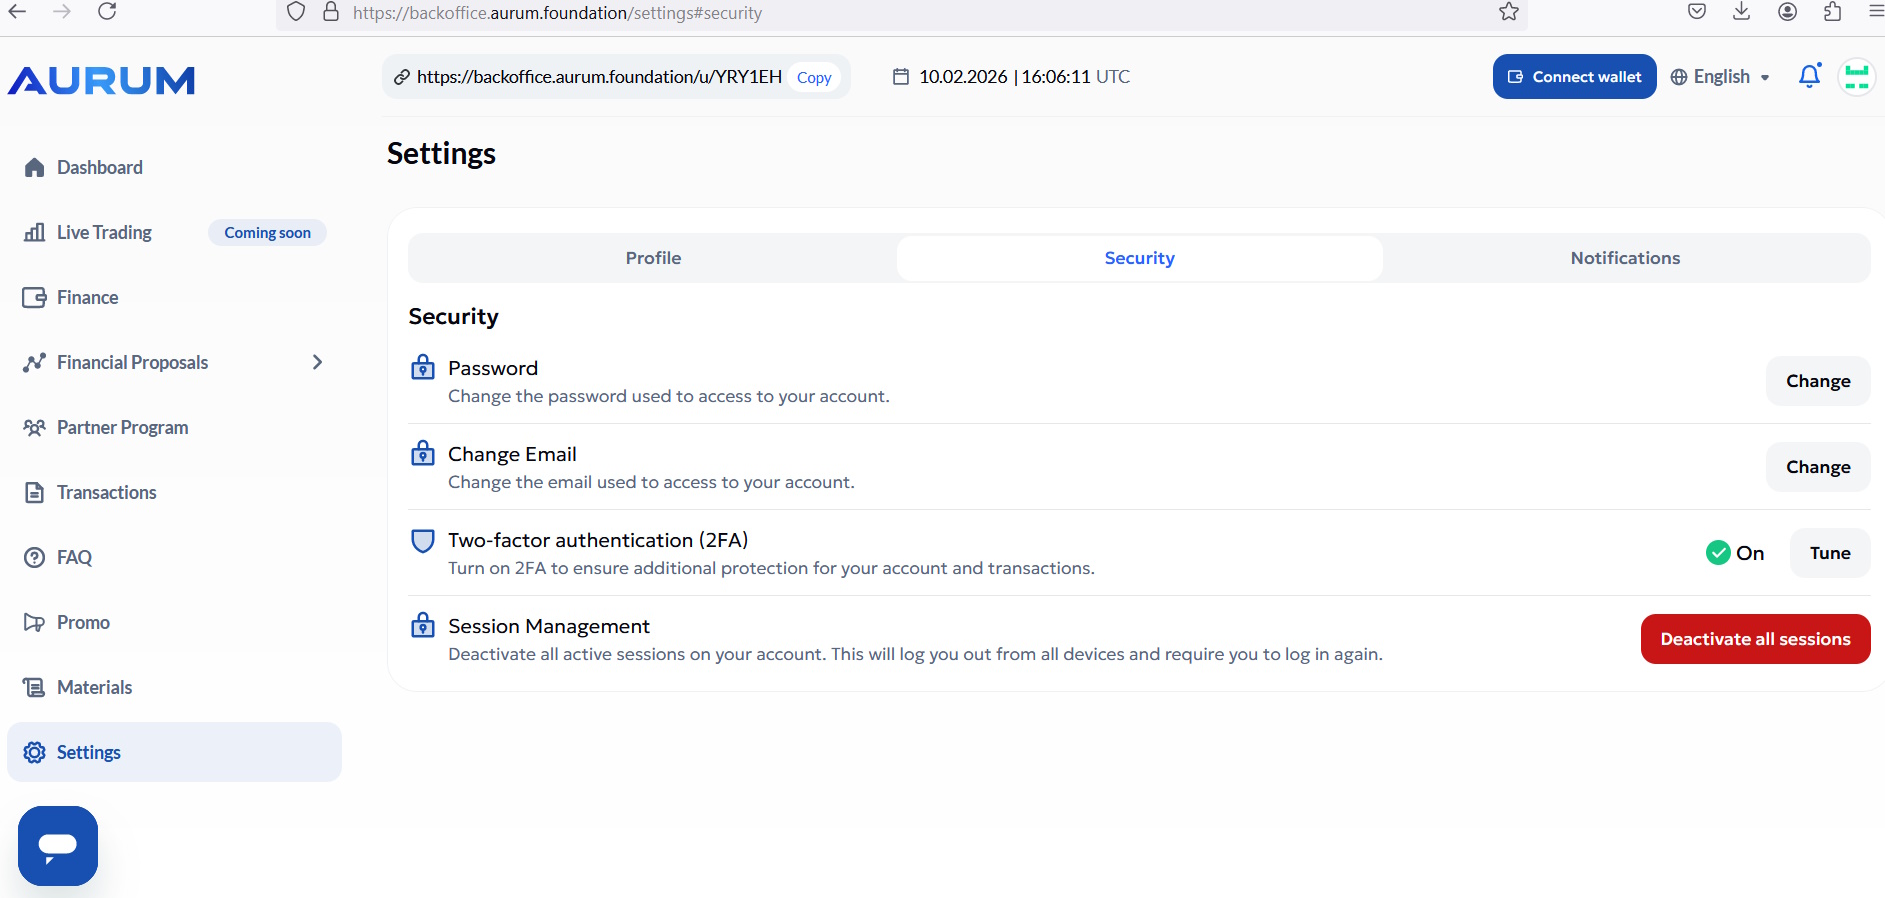
- Back in Settings → Security, confirm 2FA shows as ON.
- If backup codes are provided, store them safely (password manager is best).
Step 6: Open Telegram notifications settings
Follow the steps in order. Each step includes a full-size screenshot and clear instructions underneath.
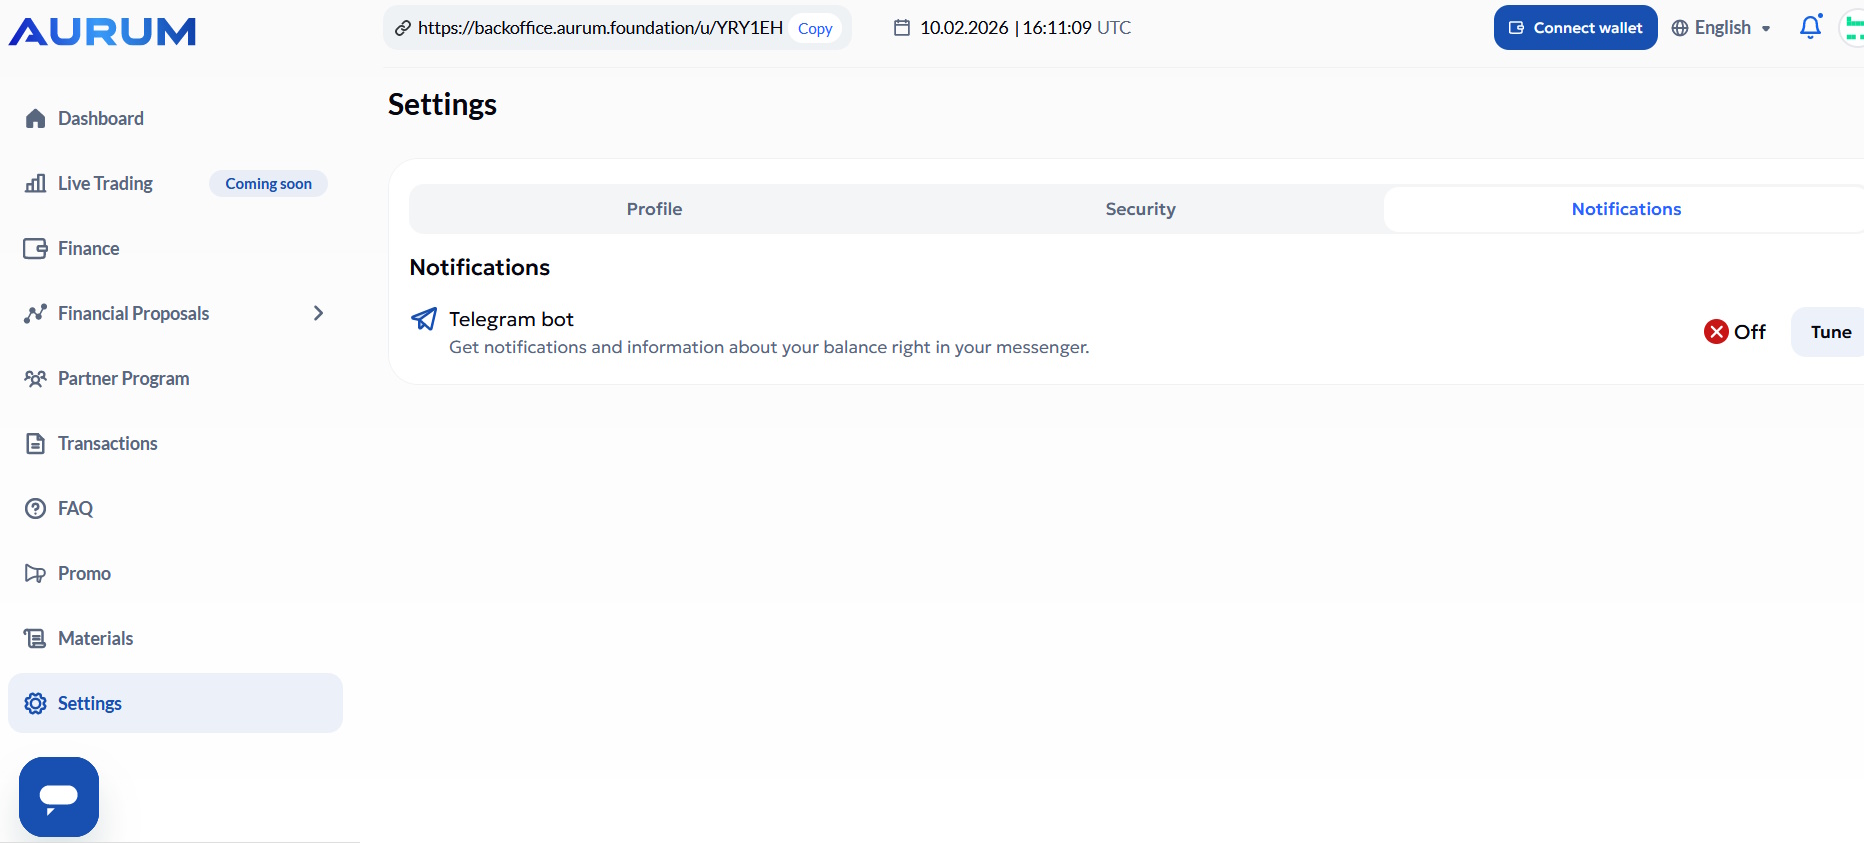
- Go to: Settings → Notifications.
- Find “Telegram bot” notifications and click “Tune”.
Step 7: Go to Telegram and start the bot
Follow the steps in order. Each step includes a full-size screenshot and clear instructions underneath.
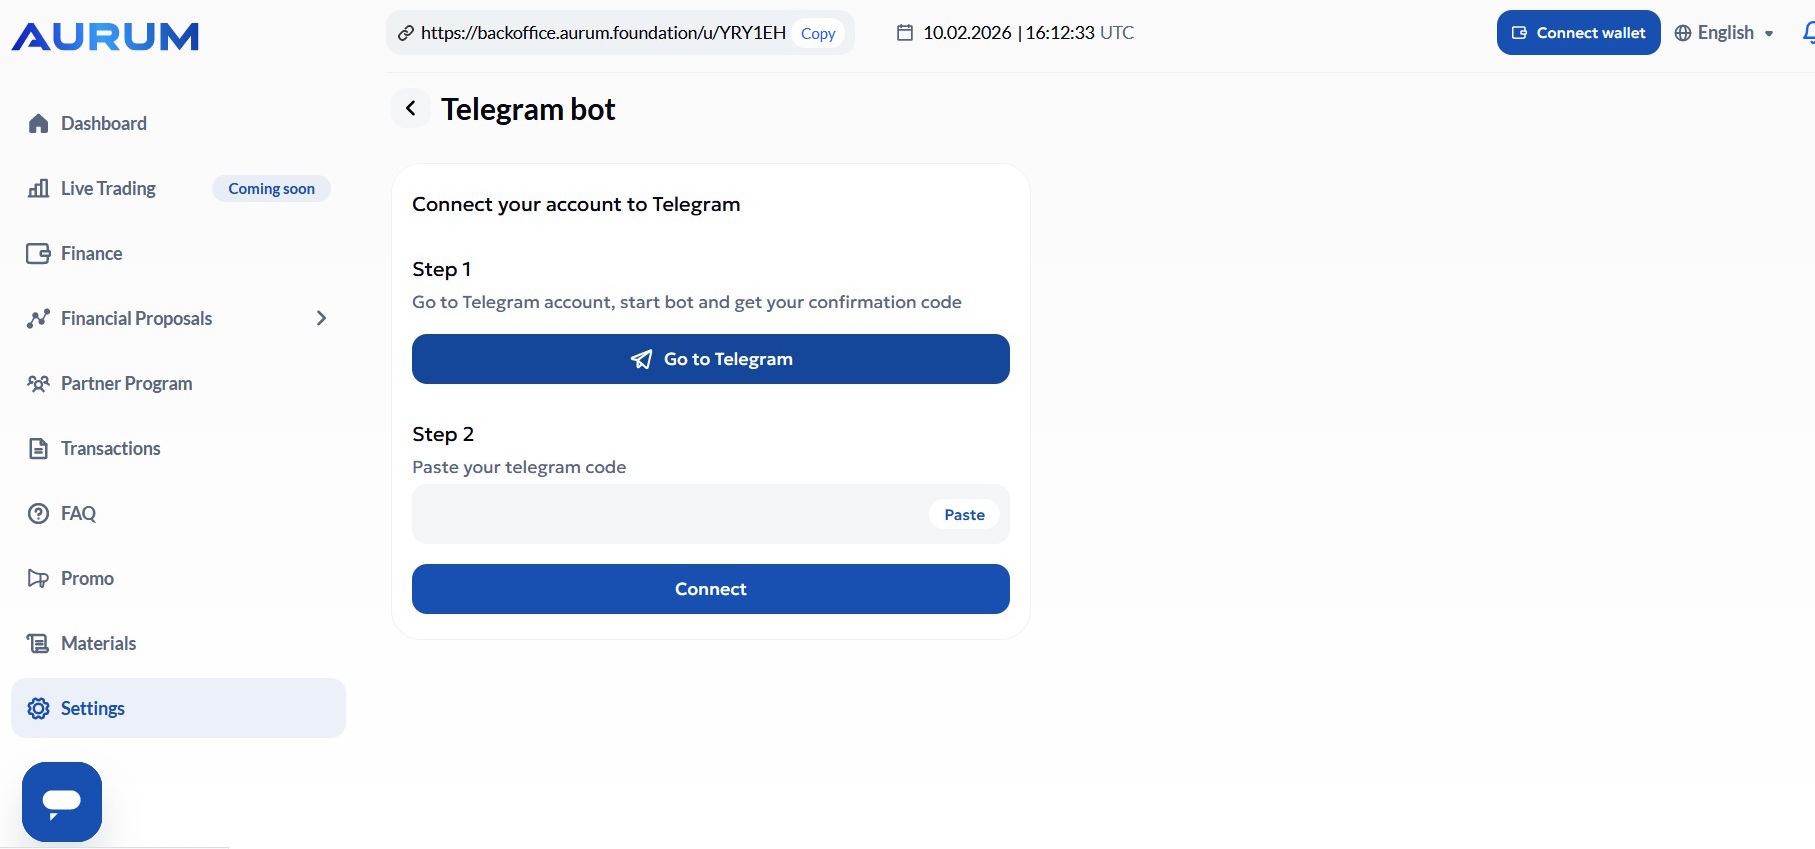
- Click “Go to Telegram”.
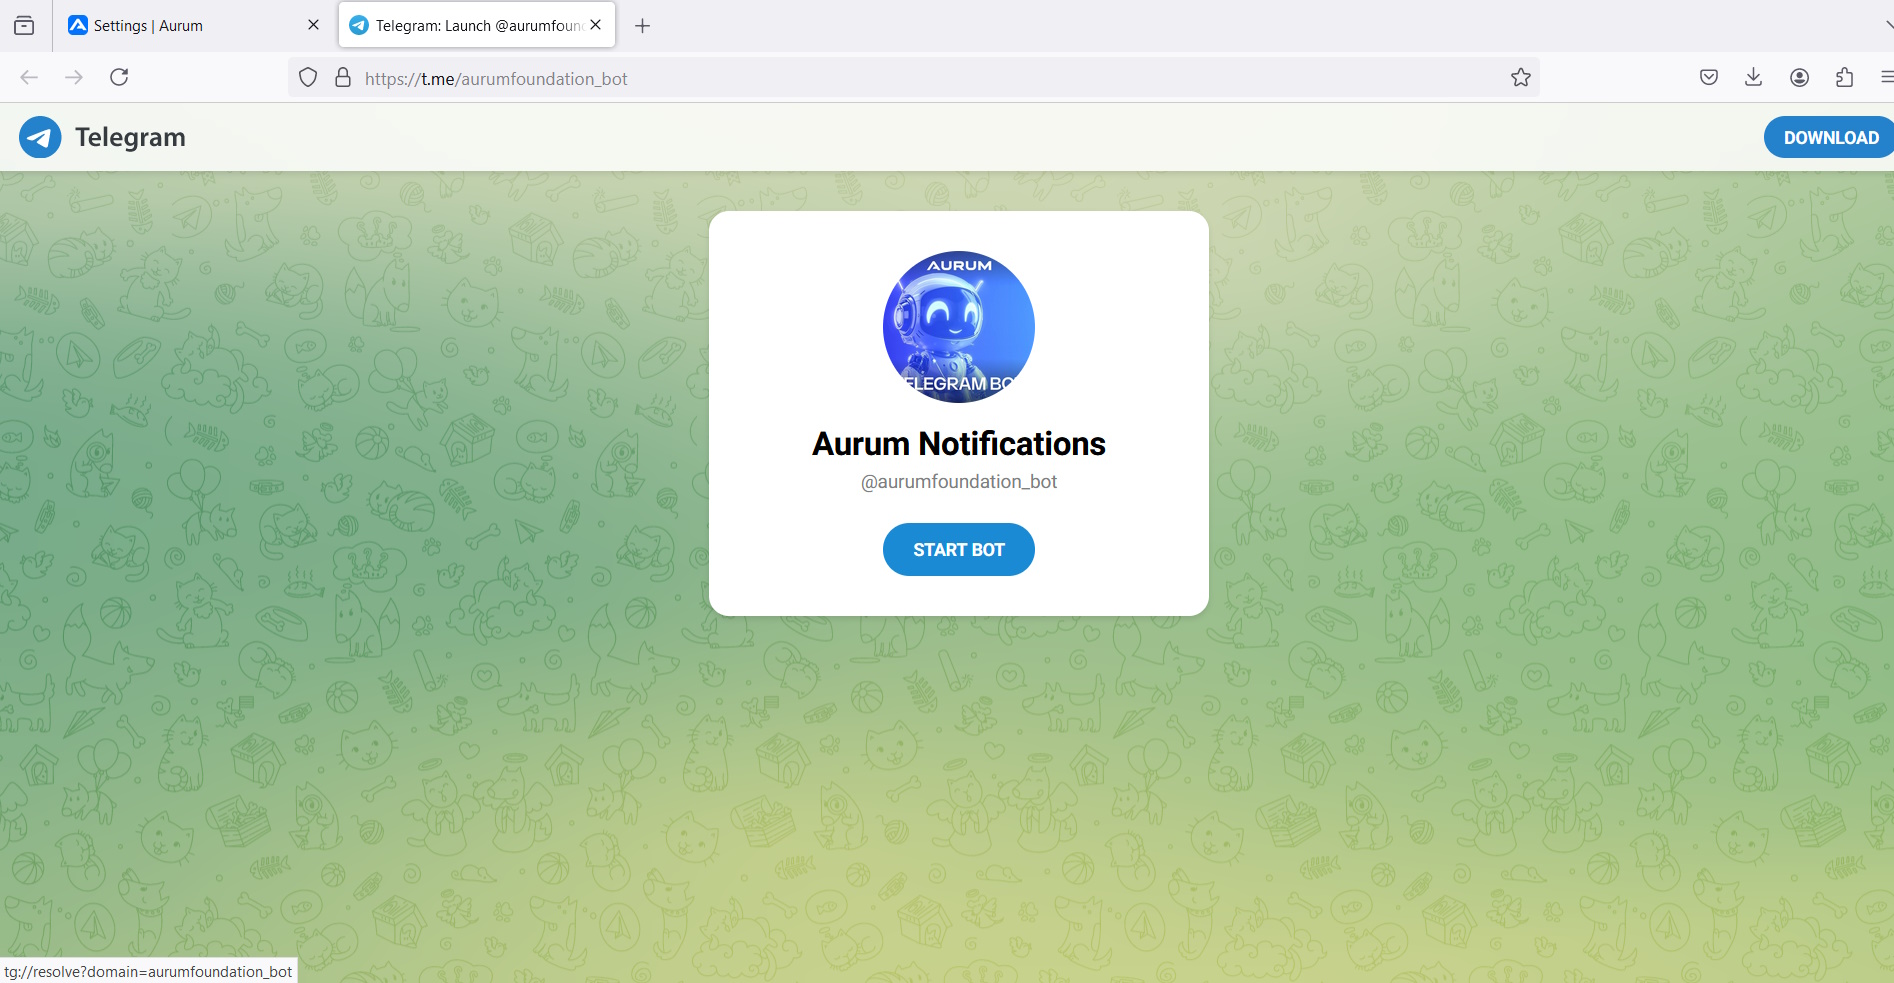
- Telegram will open the official notification bot (example: @aurumfoundation_bot).
- Press “START BOT”.
Step 8: Paste the Telegram confirmation code
Follow the steps in order. Each step includes a full-size screenshot and clear instructions underneath.
- The bot will give you a confirmation code.
- Copy the code, paste it into Step 2 on the Aurum page, and click “Connect”.
- When connected, you’ll receive balance/activity notifications in Telegram.
Step 9: Top‑up your main balance
Follow the steps in order. Each step includes a full-size screenshot and clear instructions underneath.
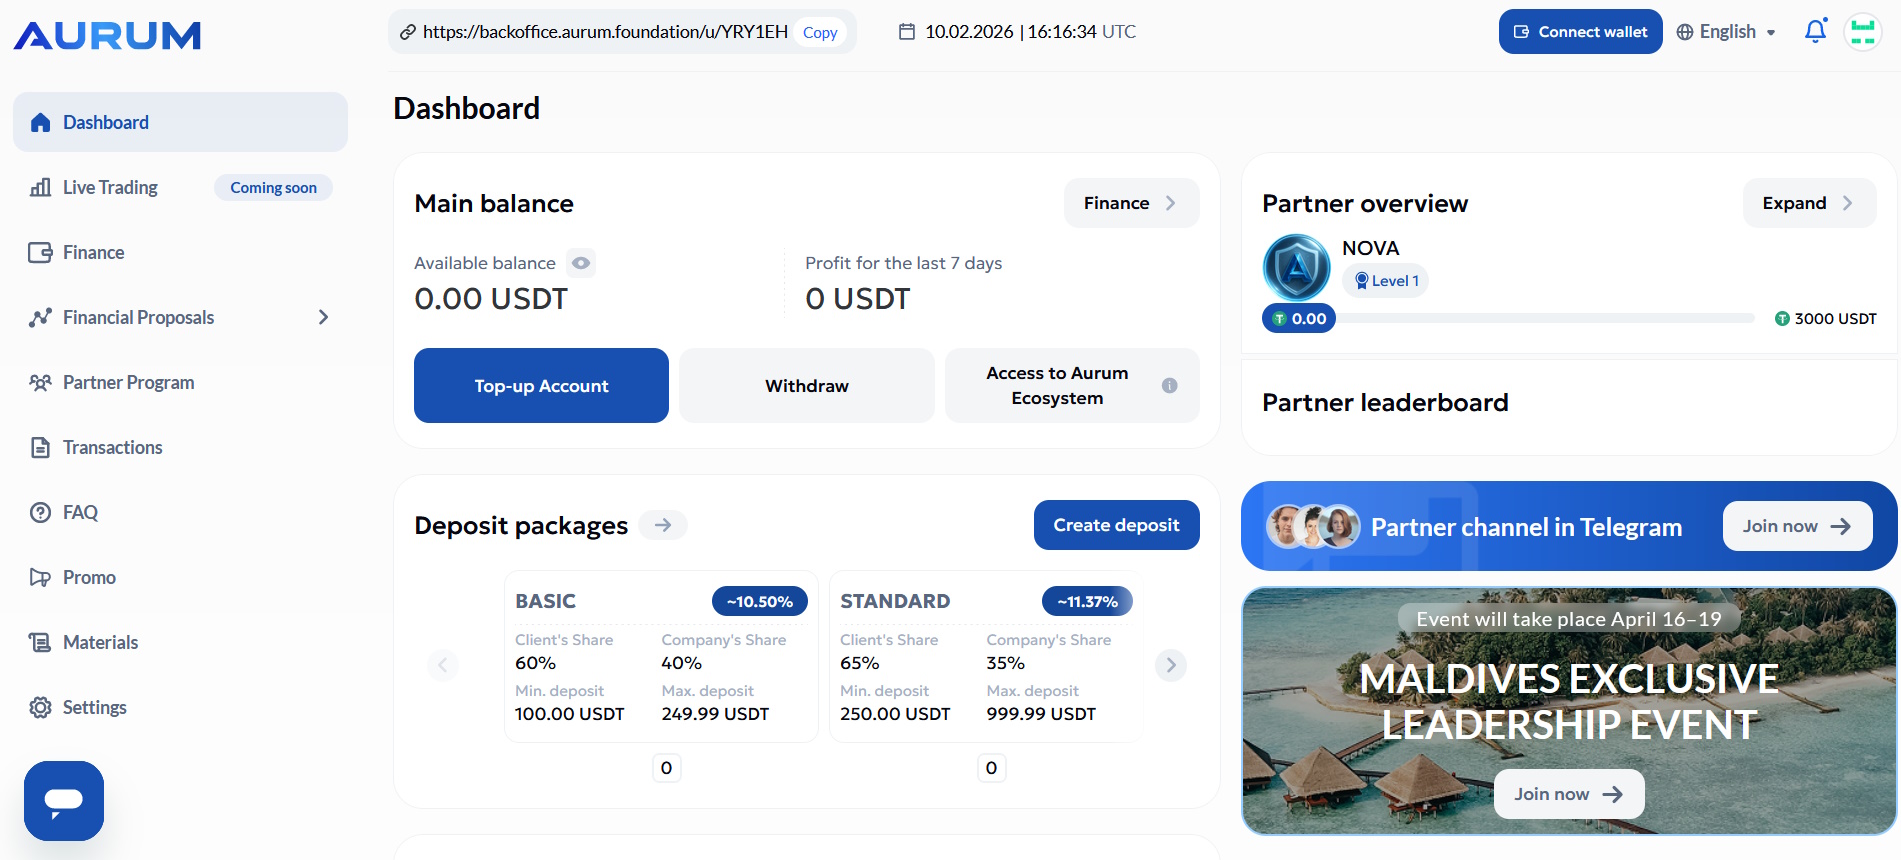
- From the Dashboard, click “Top‑up Account”.
- Choose the asset you want to deposit (commonly USDT).
- Continue to the network selection.
Step 10: Select the network (TRC20 or BEP20)
Follow the steps in order. Each step includes a full-size screenshot and clear instructions underneath.
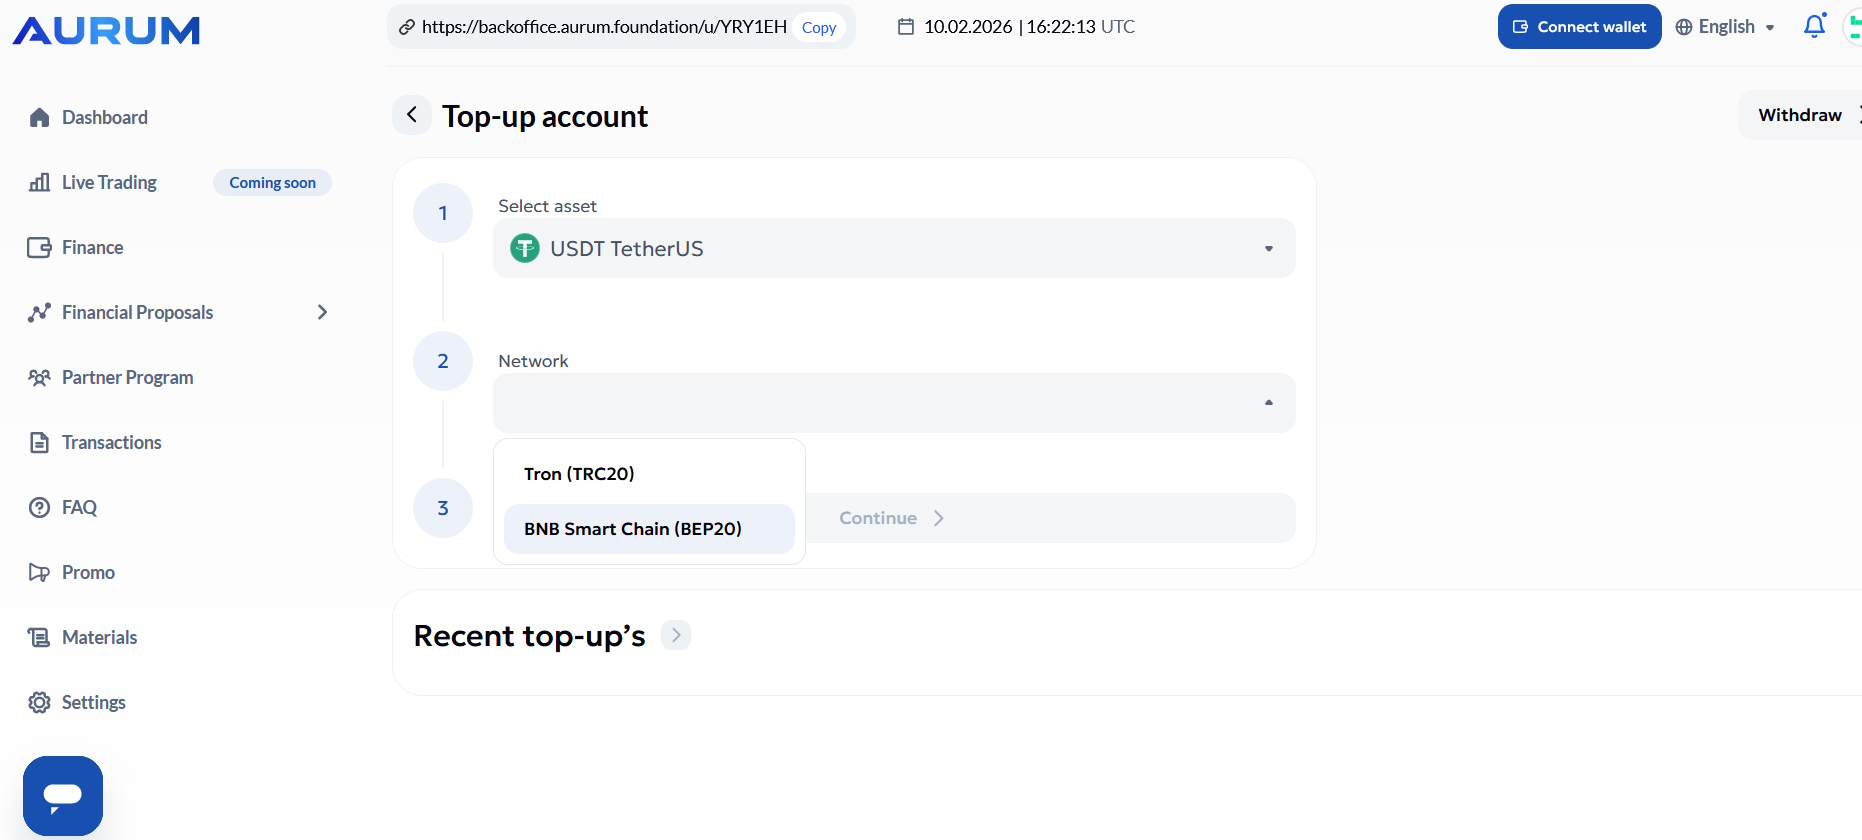
- Choose the network you will send funds on (for example TRC20 or BNB Smart Chain BEP20).
- Important: The network you pick here must match the network you select in your sending wallet/exchange.
Step 11: Copy the deposit address (or use QR)
Follow the steps in order. Each step includes a full-size screenshot and clear instructions underneath.
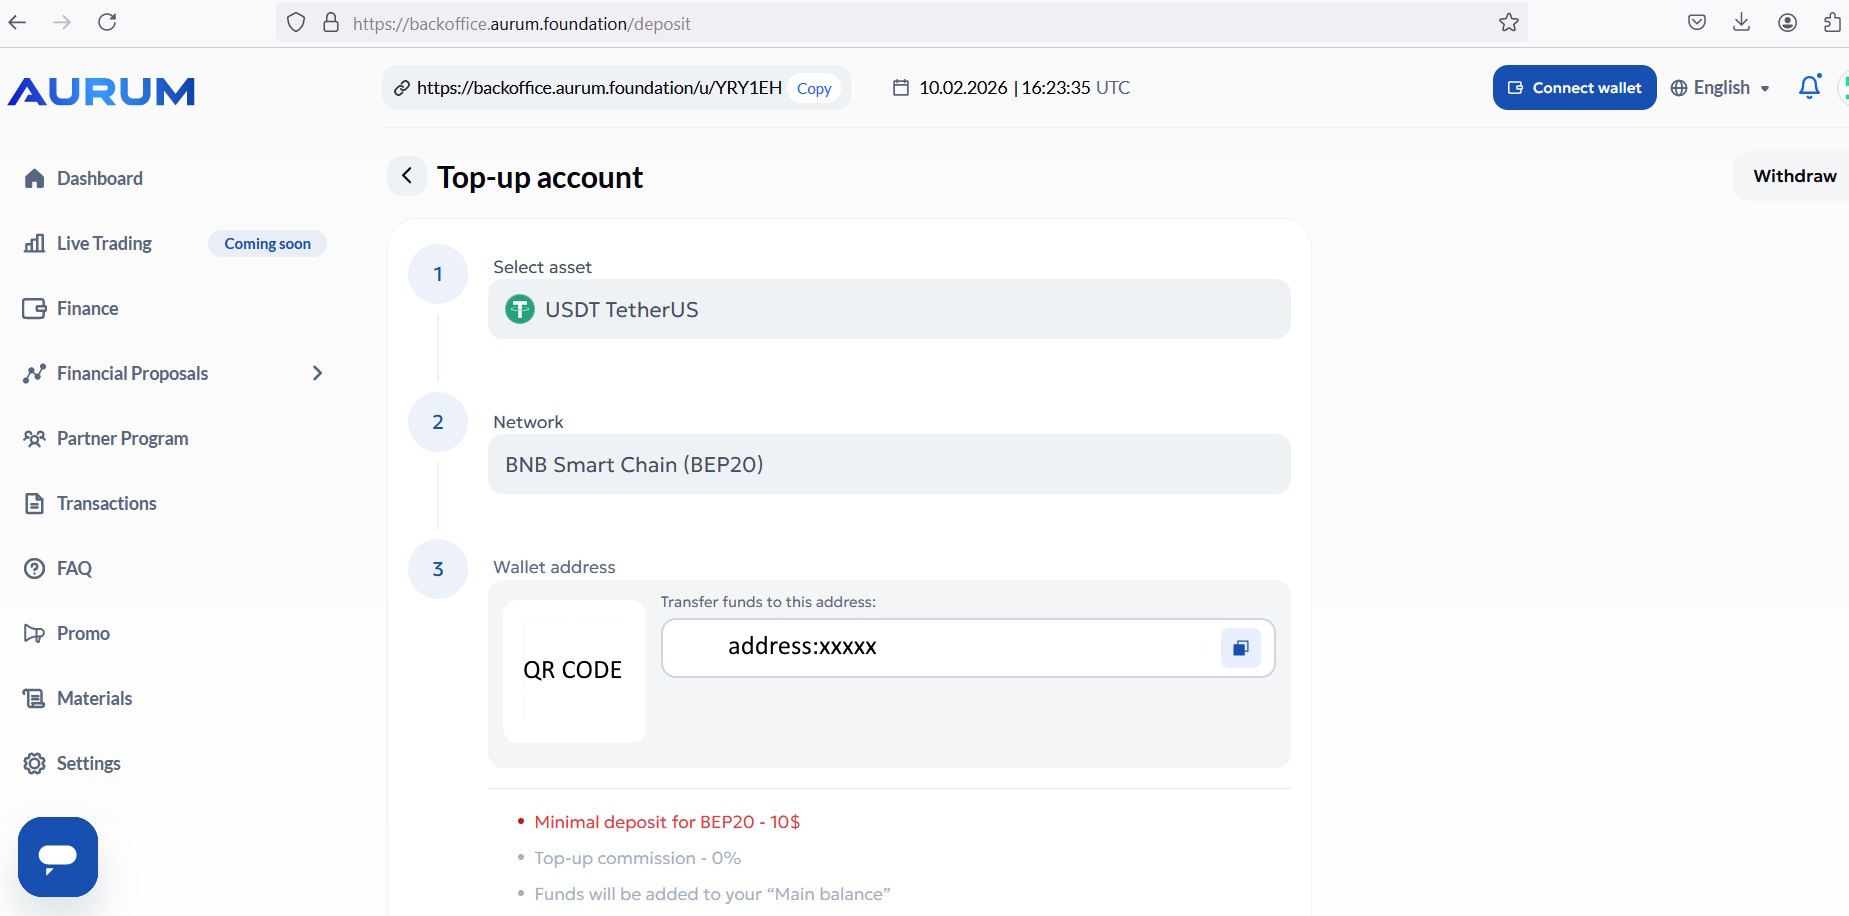
- Copy the wallet address shown on the page (or scan the QR code).
- Send the funds from your wallet/exchange to this address.
- Respect the minimum deposit amount shown on the screen.
Step 12: Confirm access to the ecosystem (if required)
Follow the steps in order. Each step includes a full-size screenshot and clear instructions underneath.
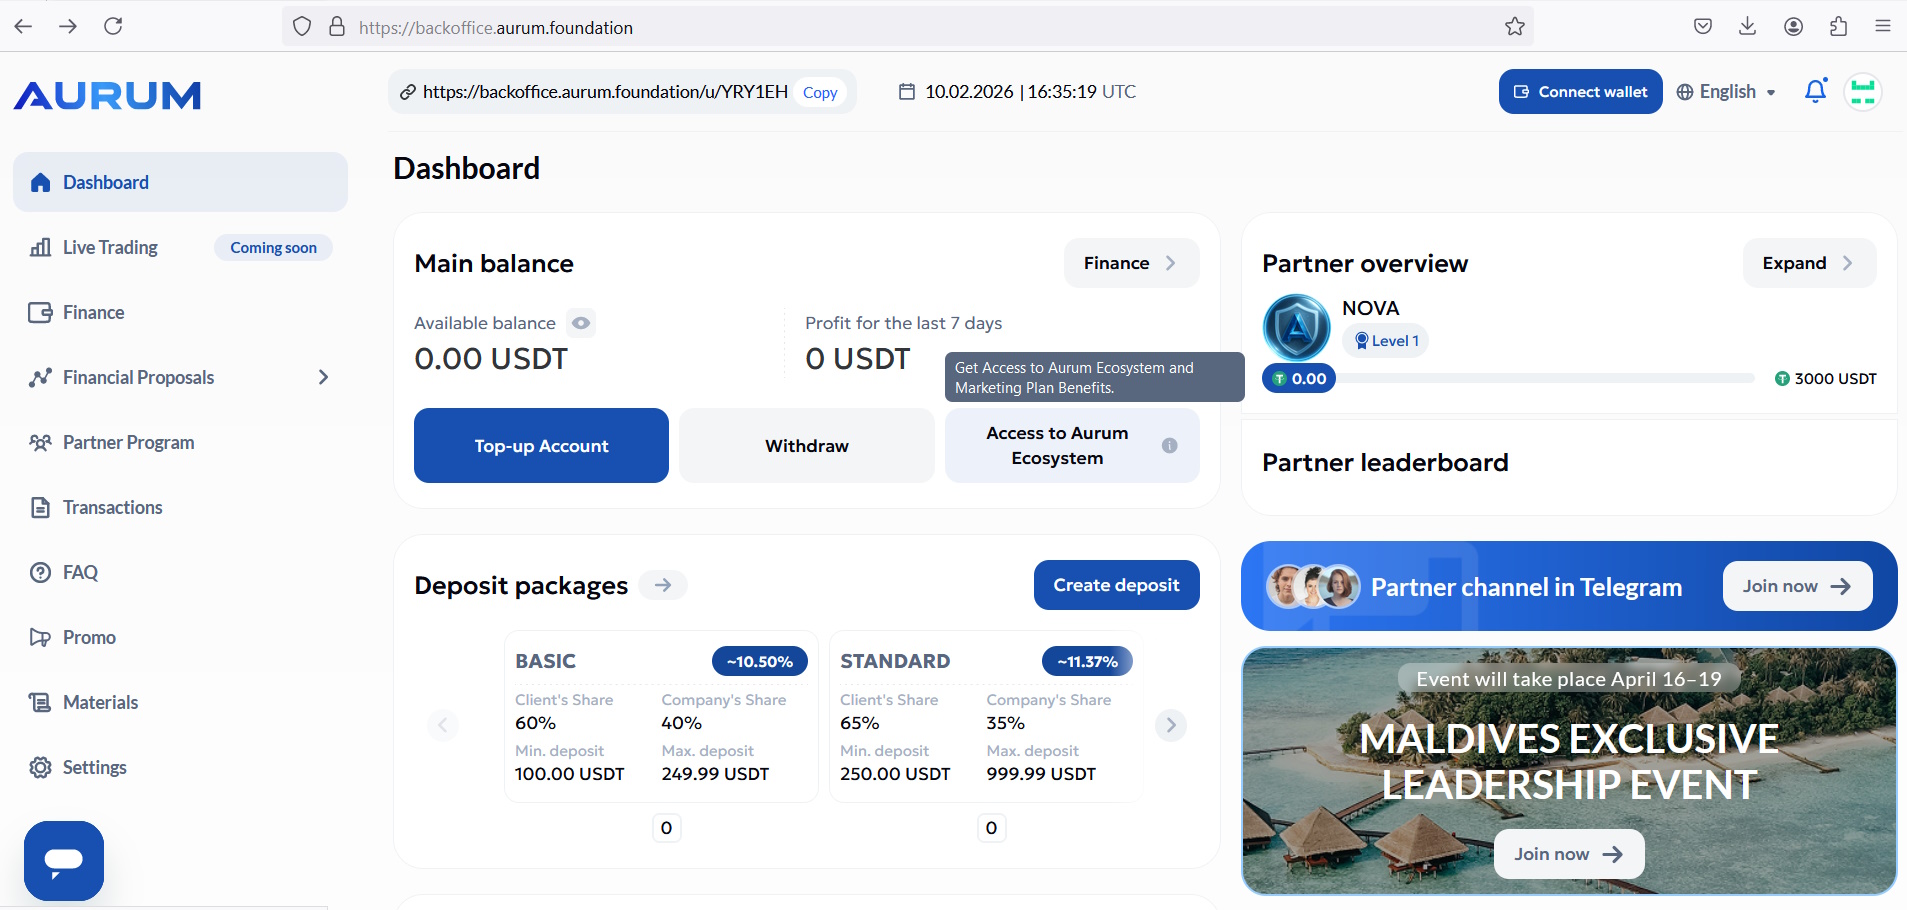
- On the Dashboard, you may see an “Access to Aurum Ecosystem” button.
- If required, click it to activate access.
- When successful, the button typically turns green with a checkmark.
Step 13: Open the Ex‑AI Bot page
Follow the steps in order. Each step includes a full-size screenshot and clear instructions underneath.
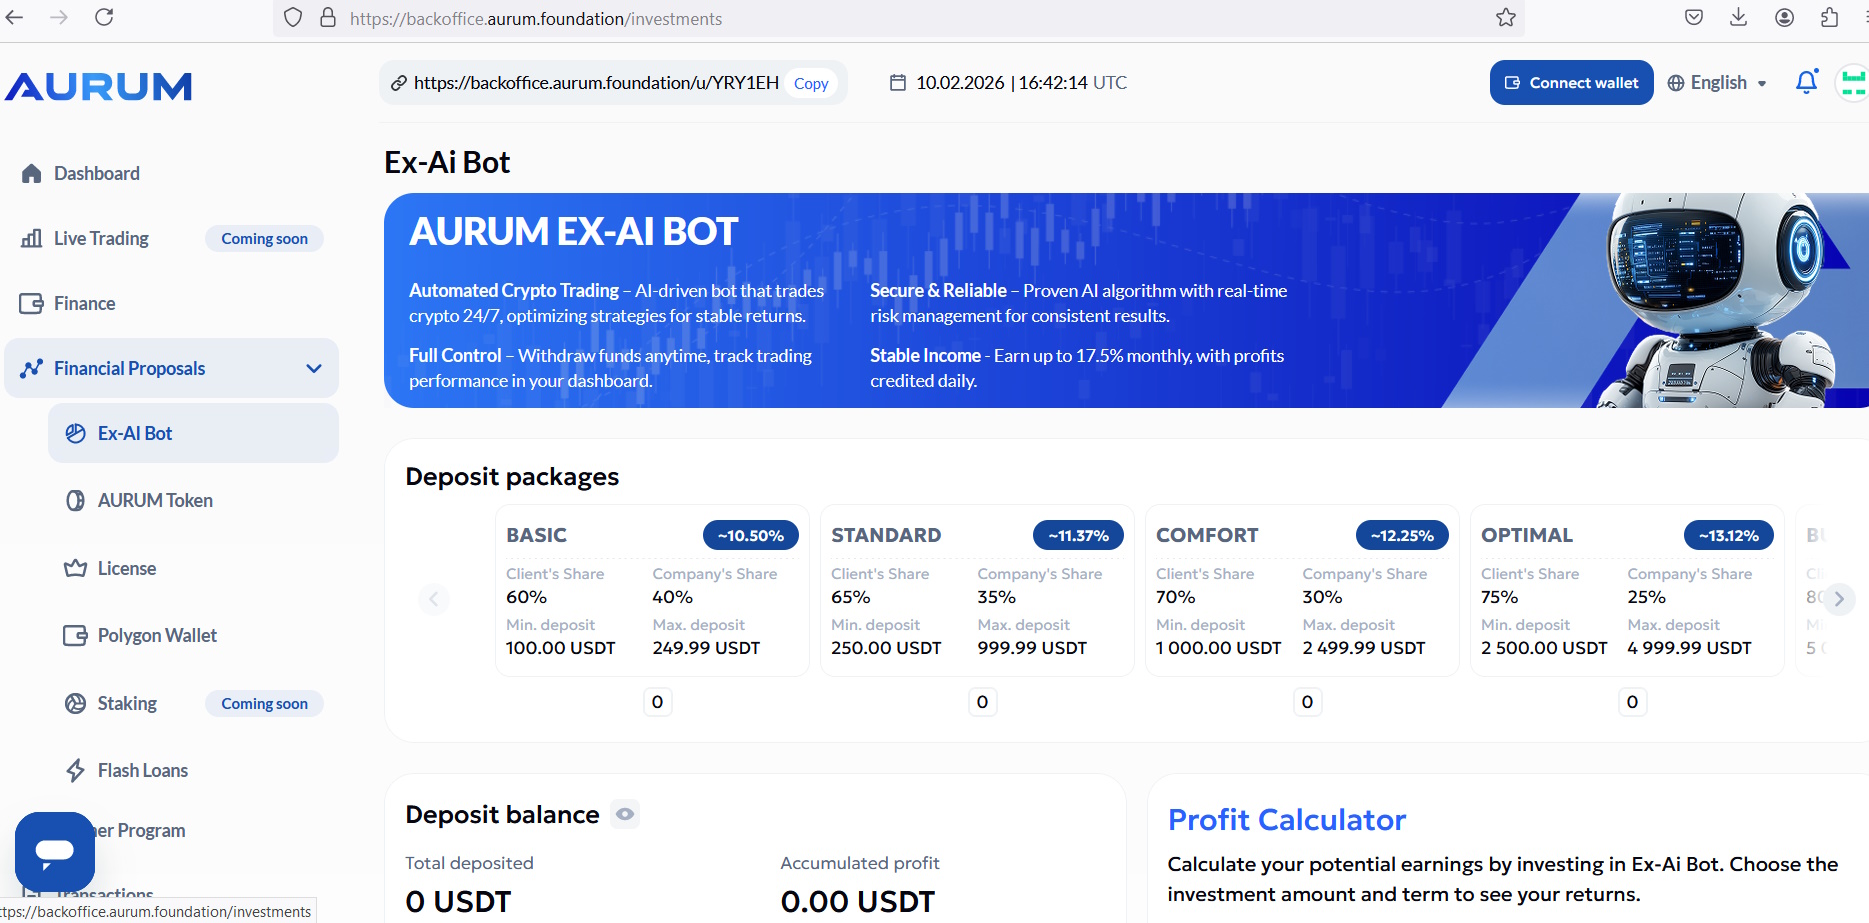
- Go to Financial Proposals → Ex‑AI Bot.
- Review the available deposit packages and terms.
Step 14: Create a deposit package
Follow the steps in order. Each step includes a full-size screenshot and clear instructions underneath.
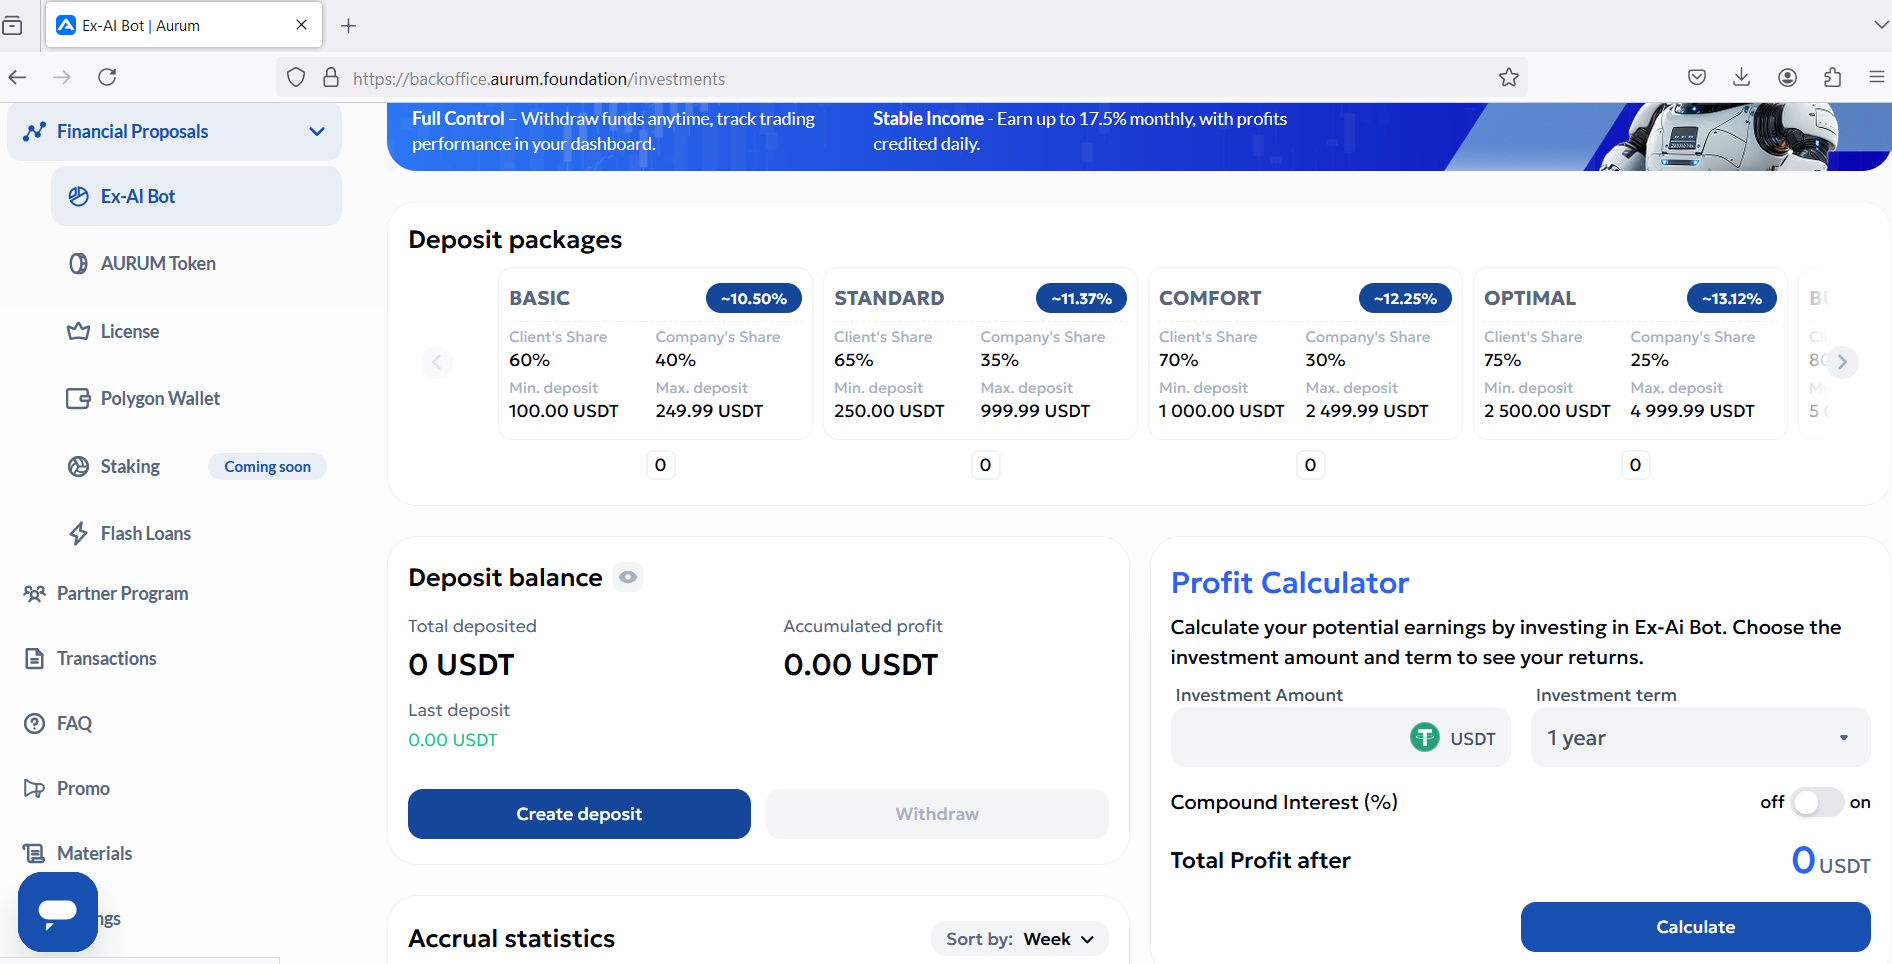
- Click “Create deposit”.
- Select your package and enter the deposit amount.
- Double‑check everything, then confirm.
Step 15: Optional: enable Reinvest
Follow the steps in order. Each step includes a full-size screenshot and clear instructions underneath.

- In “My deposits”, you can switch Reinvest ON/OFF depending on your preference.
- If Reinvest is ON, profits are reinvested automatically (as shown by the toggle).
- Use “Withdraw deposit” according to the platform rules if you want to withdraw.
Disclaimer: Educational content only. Not financial advice. Results and risks vary. Never share your password, seed phrase, or 2FA codes with anyone.